Sims 4 How To Build Ponds (Complete Guide) 2024
Greetings, fellow Simmers! In The Sims 4, creating the ideal pond may turn your Sim’s house into a peaceful retreat, regardless of expertise level as a virtual world architect.
The creative and leisure options have increased beyond measure with the addition of the pond tool in the most recent versions.
In this Blog, We’ll cover everything you need to know to create a pond, from the fundamentals of digging and sculpting your water feature to more complex advice on adding vibrant fish, rich foliage, and captivating ornamental components.
Prepare to improve your gardening skills and produce breathtaking aquatic settings that your Sims will like exploring. In The Sims 4, let’s take on this watery adventure and make a significant impact!
The Sims 4 Pond Construction Guide
In The Sims 4, making a pond requires several stages, including sculpting the land, adorning the pond, and even constructing over it. This comprehensive guide will assist you in creating a lovely and helpful pond in your Sims environment.
1. Forming Your Concept

The Sims 4 lacks the pre-made pond function found in earlier Sims games. Instead, you will form your pond with landscape tools and add water. More creativity and customization are possible with this approach.
Procedure:
Lowering the Terrain:
- In Build Mode, click the terrain tool icon to navigate to the terrain tools.
- Choose the Lower Terrain instrument.
- Reduce the brush speed to roughly 25% using the slider or input box. This causes the tool to slow down, enabling more accurate and controlled sculpting.
- To mold the terrain into the shape you want for your pond, click and drag. Instead of a sudden drop, go for a gentle descent. Raising a portion of the land above the planned water level will allow you to create an island in the center of your pond.
Filling with Water:
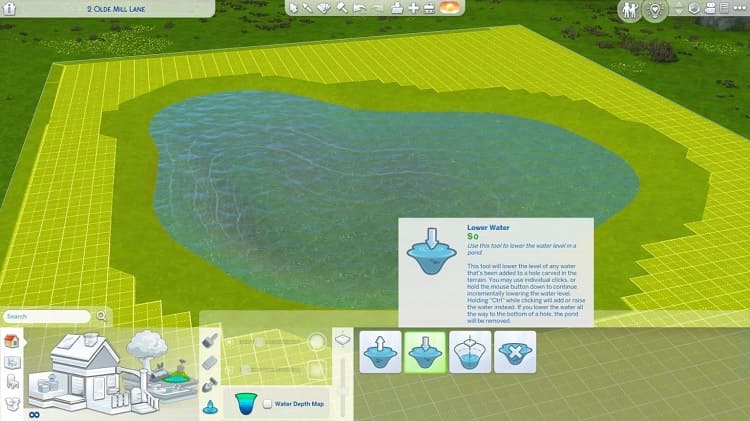
- In the toolbar next to the terrain tools, select the Water Tool.
- There are primarily two ways to fill your pond:
Increase the Water Level: To gradually raise the water level to the appropriate height, click on the terrain repeatedly.
Fill to Height: This tool rapidly raises the area’s water level to the standard setting. Use the [ and ] keys to change the height to get the exact water level you desire.
- It’s usually easiest to use the reduce Water Level tool to slightly reduce the water level after using the Fill to Height tool to achieve a more natural look.
Checking Water Depth:
- To find out how deep your pond is, use the Water Level Map. Steer clear of creating a too deep pond, as this may interfere with specific pond effects, including spawners floating above or below the water.
You can keep adjusting the terrain once the water is in place. The water level will automatically react to your modifications, simplifying the pond’s shape.
2. Pond Decoration
Add a variety of decorations and components to your pond to improve its look and utility. The pond will appear more alive and natural as a result.

Procedure:
Adding Decorations:
- Select the Outdoor Water Decor area after putting the build mode into action.
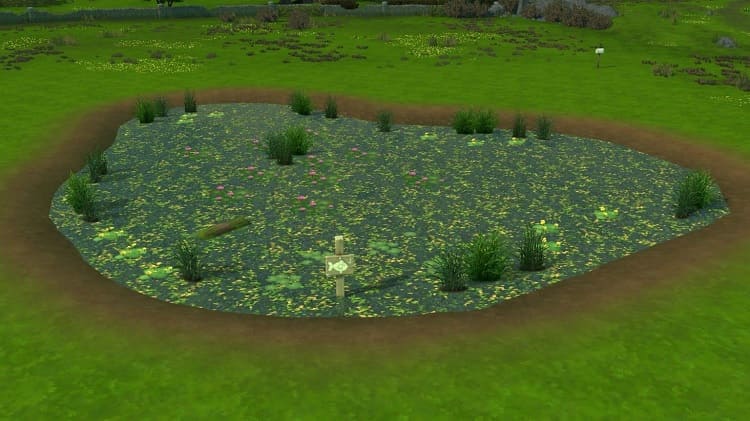
- This area has many different things, such as rocks, plants, and logs. Arrange these objects in and around your pond to get a natural appearance.
- Select from six distinct water designs to alter the way the water looks. This might give your pond more personality and distinctiveness.
Adding Flora and Fauna:
- Insects and animals will liven up your pond.
- Use animals and insects from the same Outdoor Water Decor section to add life to your pond.
- If the pond is usable for fishing, post a Fishing Allowed Sign close by. This gives your design an interactive feature, enabling Sims to fish in your pond.
3. Constructing Above Ponds
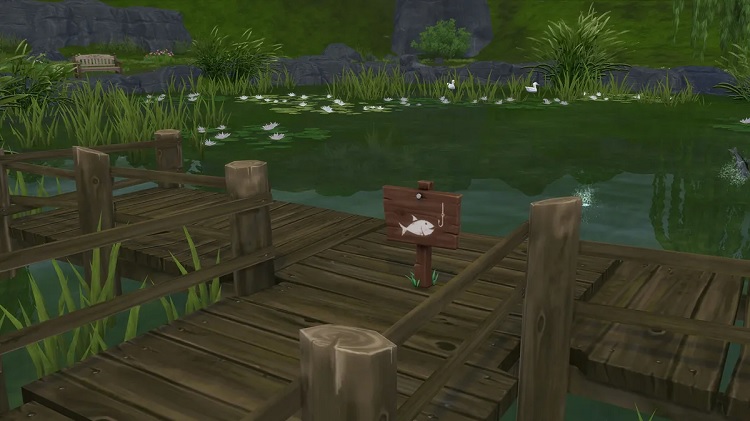
When you build structures over ponds, your Sims’ interactions with nature take on a new meaning. Decks and other structures can be constructed over the water to create aesthetically pleasing and valuable areas.

Procedure:
1. Building a Deck:
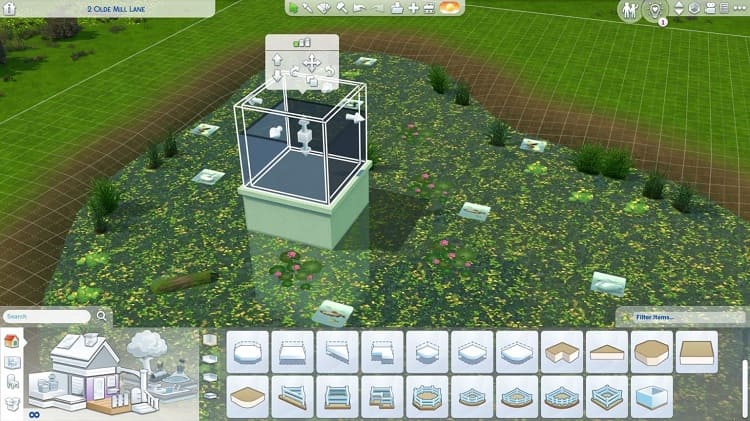
- Choose the deck tool and draw the desired shape over the water to build a deck over the pond in Build Mode.
- Elevate the deck’s foundation height to level with the water. You can accomplish this by choosing the deck and utilizing the foundation height slider.
- Use the Stilted Foundation design to give the deck a more organic appearance that blends with the surrounding pond.
2. Enhancing the Area:
- Arrange chairs and other items on the deck to provide a picnic area, BBQ area, or a calm haven.
- Use extra décor, lighting, and plants to improve the room’s appearance and usefulness.
Feel free to try building over ponds. You can design various structures and arrangements to take full advantage of this feature and give your Sims’ outside areas a distinctive feel.
These instructions will help you build a lovely, helpful pond in The Sims 4 with interactive features and natural accents.
How to Add Fish to Sims 4 Ponds
Add some fish, and your lovely new pond will become a fisherman’s dream come true. In The Sims 4, use these instructions to add a variety of fish species to your pond.

Procedure for Adding Fish to Your Pond
Approach 1:
1. Take a Fishing Trip
Take your Sims fishing at any available location in the game using the Send Your Sims Fishing option. Let them go fishing to capture different kinds of fish.
2. Gain Fishing Knowledge
Your Sims will learn more about fishing and develop fishing skills as they capture various species. Every newly discovered species will be noted in their notebook.
3. Stock, Your Pond
Your Sims can add fish to the home pond by selecting the “Fishing Allowed Sign” in Live Mode and then choosing the fish addition option after catching a particular fish.
If your Sims have caught tropical or exotic fish, you can fill your pond with them using this approach, which works with species from all expansions.
Approach 2:
1. Shop at a Grocery Store or Order Delivery
Your Sims can shop at a grocery store in-game or order Delivery using the brand-new “Grocery Delivery” phone feature.
2. Purchase Fish
Order a variety of fish from the supermarket or have it delivered. Your Sims inventory will be augmented with these fish.
3. Supply Your Pond
After purchasing the fish, utilize the fish in your inventory to supply the pond by selecting the “Fishing Allowed Sign” in Live Mode.
These techniques will help you populate your pond with a diverse range of fish and make it a lively fishing area for your Sims. Please take pleasure in observing them fish and interacting with the recent aquatic residents of their surroundings!
Conclusion
Regardless of your experience building virtual worlds, in The Sims 4, you can turn your Sim’s house into a tranquil haven by designing the perfect pond. The creative and recreational options have increased dramatically with the addition of the pond tool in recent upgrades.
From the fundamentals of excavating and shaping your water feature to more complex advice on adding vivid fish, rich vegetation, and eye-catching ornamental elements, we’ve covered all you need to know to build a pond in this book.
With the help of our comprehensive instructions, you may use terrain tools to form your pond, add water, and embellish it with a selection of fish and natural components. Adding decks and other buildings to your building over ponds gives it a fresh look.
faqs
In Sims 4, how can I create a pond?
After lowering the terrain with terrain tools, fill it with the water tool. Utilise elements and embellishments from the “Outdoor Water Decor” area.
Ponds in Sims 4: Where are they?
With the landscape and water tools in Build Mode, you can make ponds anywhere on your lot.
My Sim is unable to swim in their pond. Why?
Ensure you’ve added fish by going fishing or grocery shopping and that the “Fishing Allowed Sign” is posted close to the pond.
Can Sims go pond fishing?
If a pond has a “Fishing Allowed Sign” and fish have been added, then Sims are permitted to fish in it.


